I have had a mat board just sitting in my room for a few weeks now. I see it every time I wake up and every time I wake up I am reminded that I need to start a project that I have been planning. Well, my friends, today is that day.
With nothing to watch on television, no movie in hand, no husband with which to hang out... I turned on the gas logs, cried a tear over my dead plant and started my project.
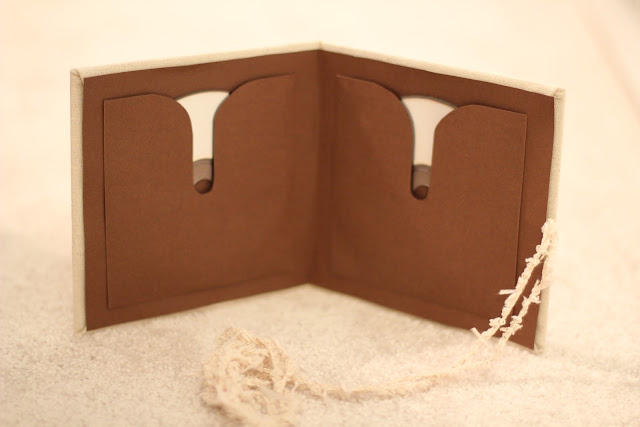
I decided I wanted to make packaging for my photography clients. Eventually, I want to make a whole line of packaging products but for now I made a CD case so that when I give a bride their pictures, they get something unique and memorable. I hope that every part of my photography business will be unique in some way so maybe this is the beginning of it.
This is basically a prototype and you will see why in a second. I tried taking pictures of each step. I wouldn't say that I completely succeeded but I did do much better than when I posted my dresser!
First, I cut out two squares from my mat board that has been eyeing me down for a week. I used Jacob's utility knife to cut it :)
I went to the fabric store today and picked up three different fabrics, a sage burlap, a linen and a brown burlap. I decided to use the linen first because it is the easiest to control.
Find the dullest scissors that you can, that is what I did. My fabric scissors are lost forever. And yes, that is duck tape (remember this is a prototype).
I started by duck taping the two boards together. I did one side first and then the other.
I cut the fabric about an inch bigger on each side.
Then... I taped it. Yes, duck tape. You should probably get used to it.
And then I couldn't figure out what to use besides duck tape to put on the paper inside until I searched and found this double-sided tape that I had from college!
Of course, with my luck, the paper is not big enough to go all the way across. So, I improvised.
And once again, the only thing that I had as a tie was this one ball of yarn which, in fact, turned out to be just perfect.
Waste a lot of your time making the curves on the sleeve perfect because that is what I did. Perfectionism strikes again!
So once I attached a sleeve to both sides, I was pretty much done. I like the look of it but will most likely change the paper inside to something more natural. I used what I had since it was my first time making it.
Here is the final product:
Also, don't forget to check out my previous post about the giveaway I am having-a free photo session! Thanks to all of you who have been so supportive!


What a sweet DIY! I believe I'll pin this :) Speaking of...are you on Pinterest?
ReplyDeleteThanks! I requested an invitation and it is just sitting in my email, I really need to go ahead and sign up for it!
DeleteReally looks special, Amanda. So creative! :)
ReplyDeleteThat's so awesome! I want to be a client so I can get one. :)
ReplyDelete